You need to change your current DNS servers to Jalmoud DNS servers to be able to protect your assets.
Domain Registration #
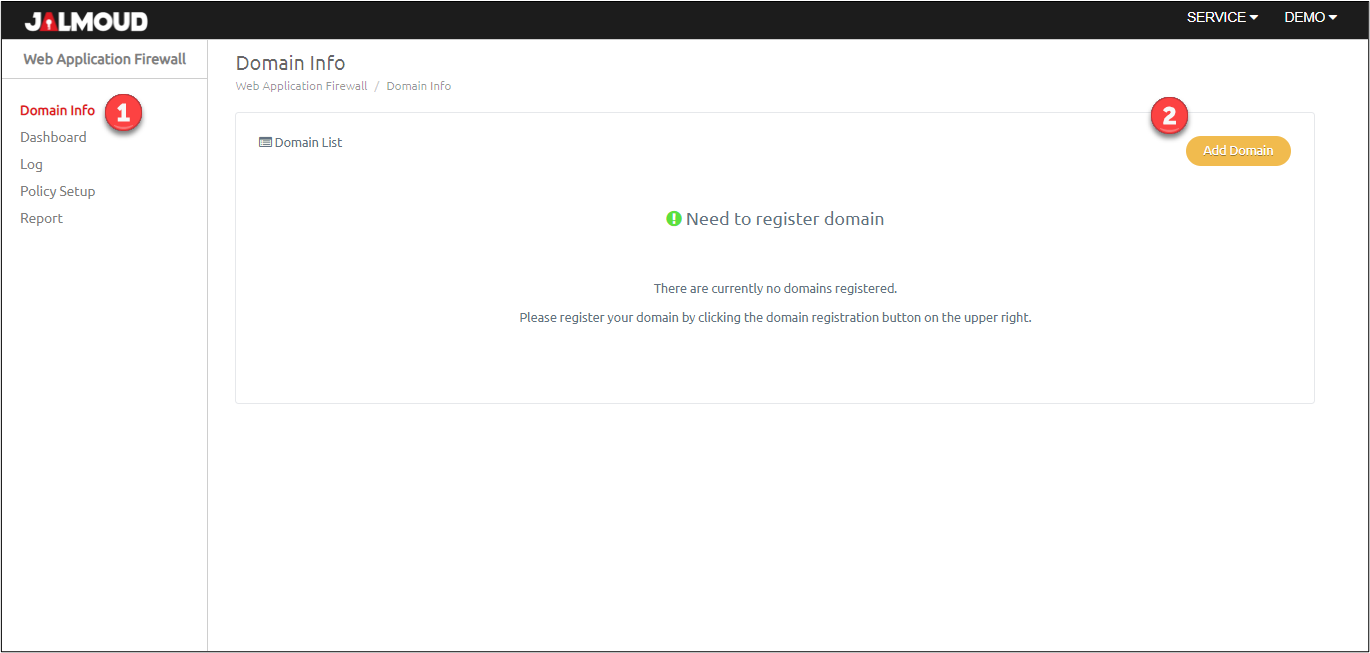
In the ‘Domain Info’ menu, click ‘Add Domain’ button to register a new domain.
After clicking ‘Add Domain’, you will be directed to below page then select ‘Root domain’
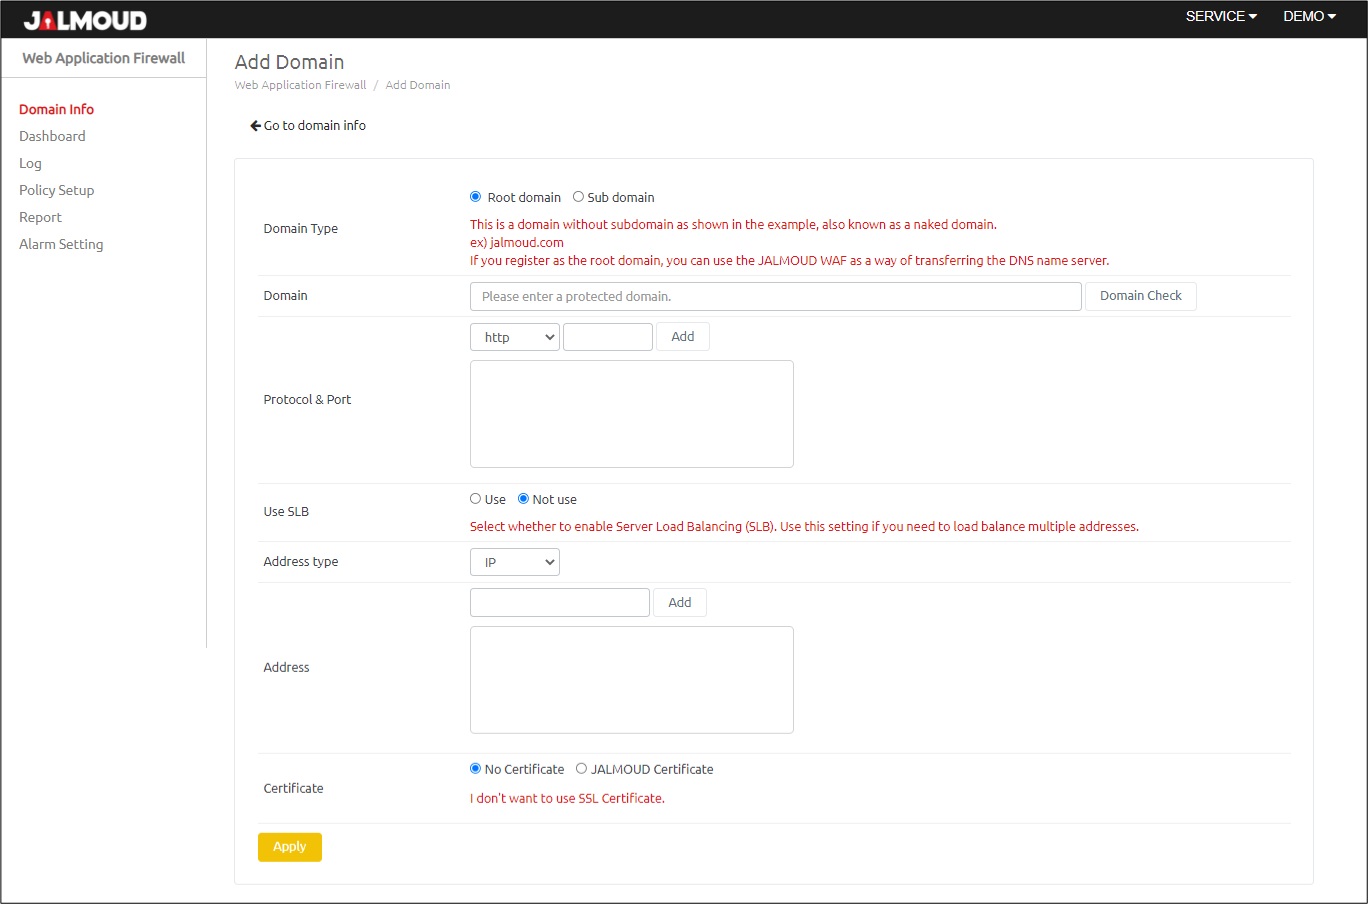
Fill in domain information in fields described below:
- Domain type: Root domain: If you want to protected “https://website.com”
- Domain: Enter domain name and click the ‘Domain Check’ button to lookup the domain.
- Protocol & Port: Protocol is either HTTP or HTTPS whilst Port is any port from 1 to 65535. Adds the protocol and port information that you are using on the actual backend server. For example, if you access your website on http://mysite.com:888 and https://mysite.com:999 then you need to add the following pairs: {http and 888} and {https and 999}, Then press ‘Add’.
- Use SLB: This feature is short for ‘Server-side load balancing’. If you have multiple public IP addresses for your website, then you may want to configure the WAF to distribute the workload across these addresses.
- Address type: You can add the origin address information of protected server whether IP type or CNAME type.
- Address: Add origin server address.
- Certificate: For HTTP, no certificate is needed whilst if you use HTTPS for your web server, you need to upload the certificate file you are currently use to Jalmoud WAF in order to be able to inspect encrypted traffic. However, when selecting JALMOUD certificates, you will use a self-signed certificate generated by Jalmoud WAF in order to be able to inspect encrypted traffic.
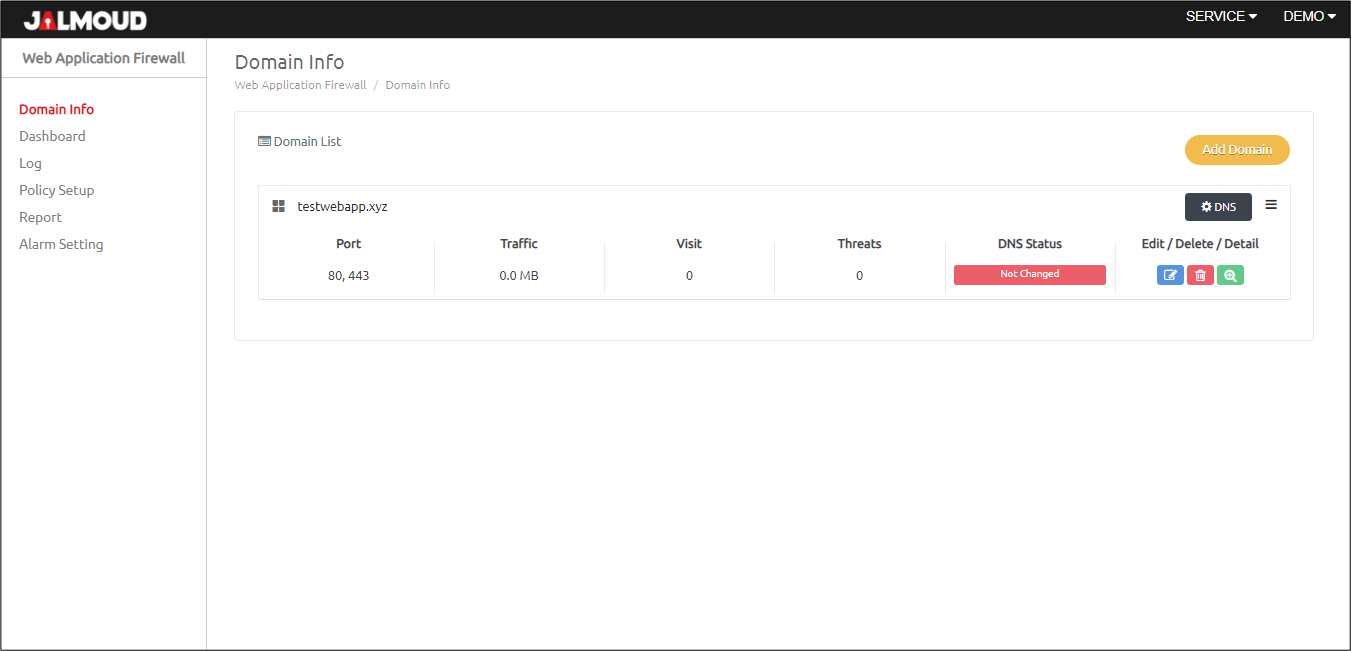
When finish configuring the protected web server, click ‘Apply’ to commit the changes. If it’s added successfully, you will see the protected domain as in the below screenshot.

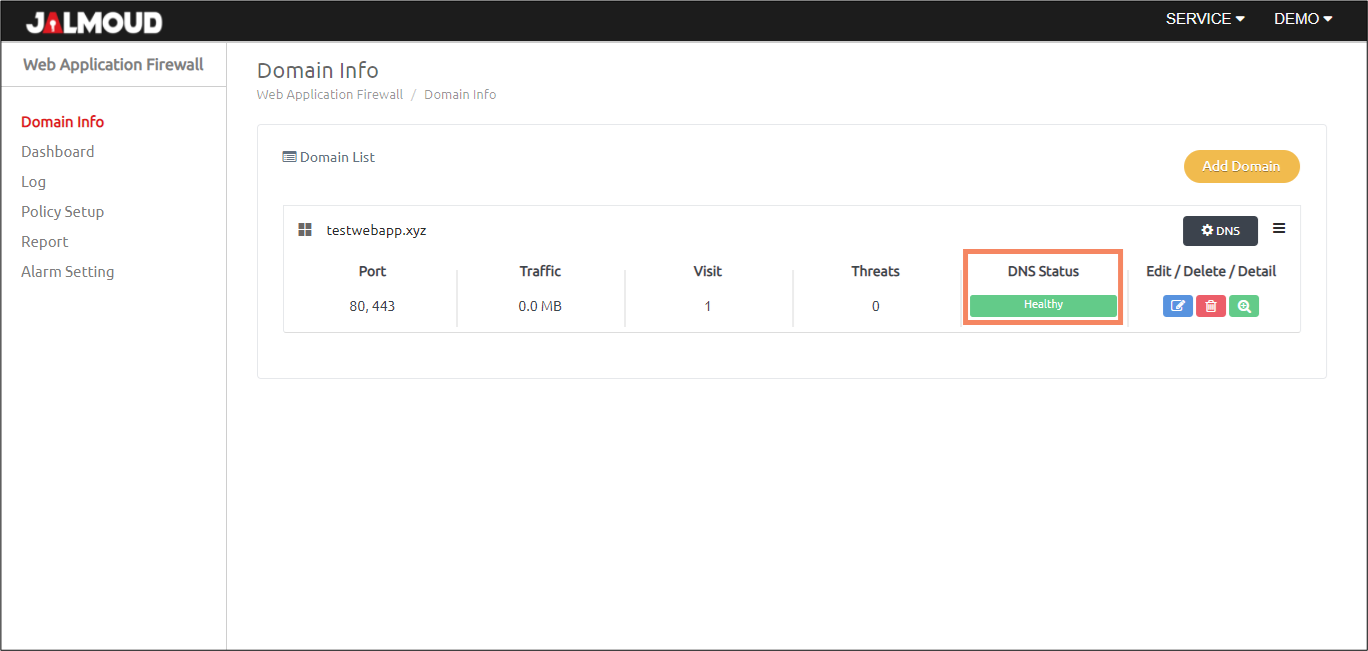
If you expand the row of the added server, you can see its attributes along with some statistics.
Server Load Balance (SLB) #
If you want to activate SLB, you need to configure below parameters.
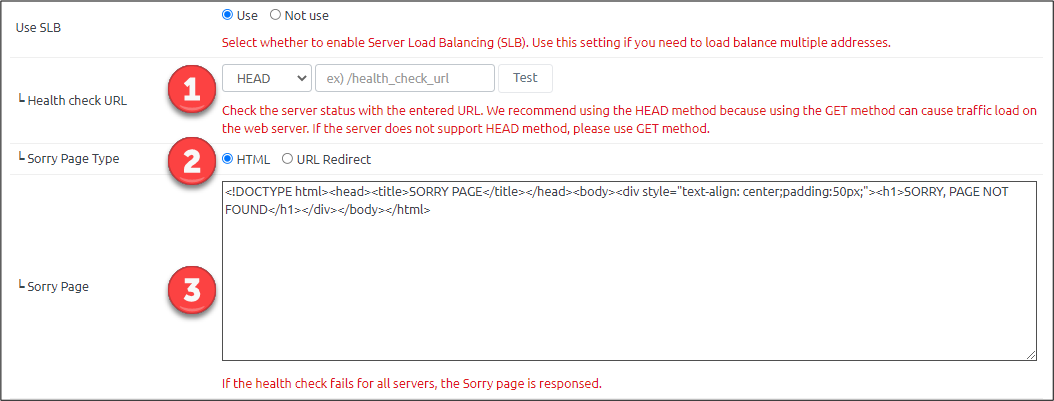
- Health Check URL: Provide the URL information to be used for checking the health of the primary server. You must click the ‘Test’ button to verify that it is checked properly.
- Sorry Page Type: Select the type of ‘Sorry page’ that will be served to the client in the event of a failed health check on all servers. You can type the page directly into HTML or redirect it to another URL.
- Sorry page: You can select either an HTML page or a URL to redirect the client upon failure.
Change DNS Servers #
After configuring the protected web server correctly, we need to change the DNS information to redirect we requests to Jalmoud WAF. Below are the steps needed for this task.
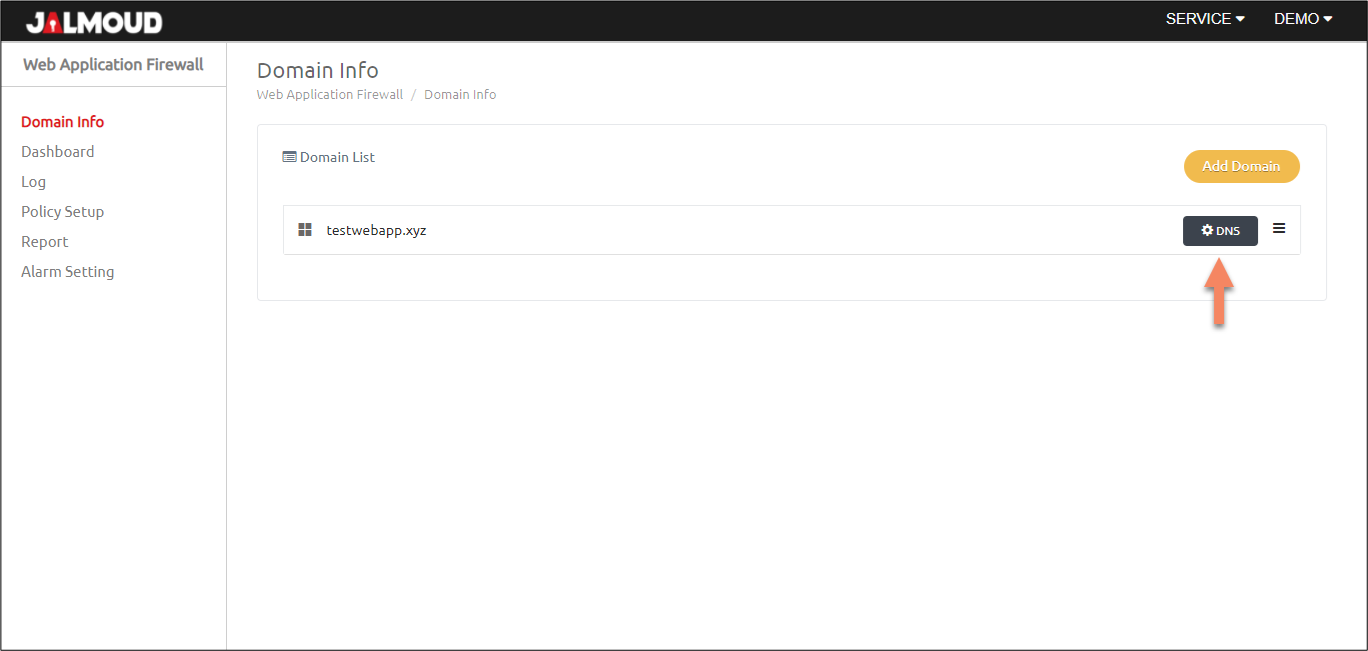
- Navigate to ‘Doman Info’ tab
- Click on gear and DNS button to check for the ‘Name Server’ record in the DNS menu.
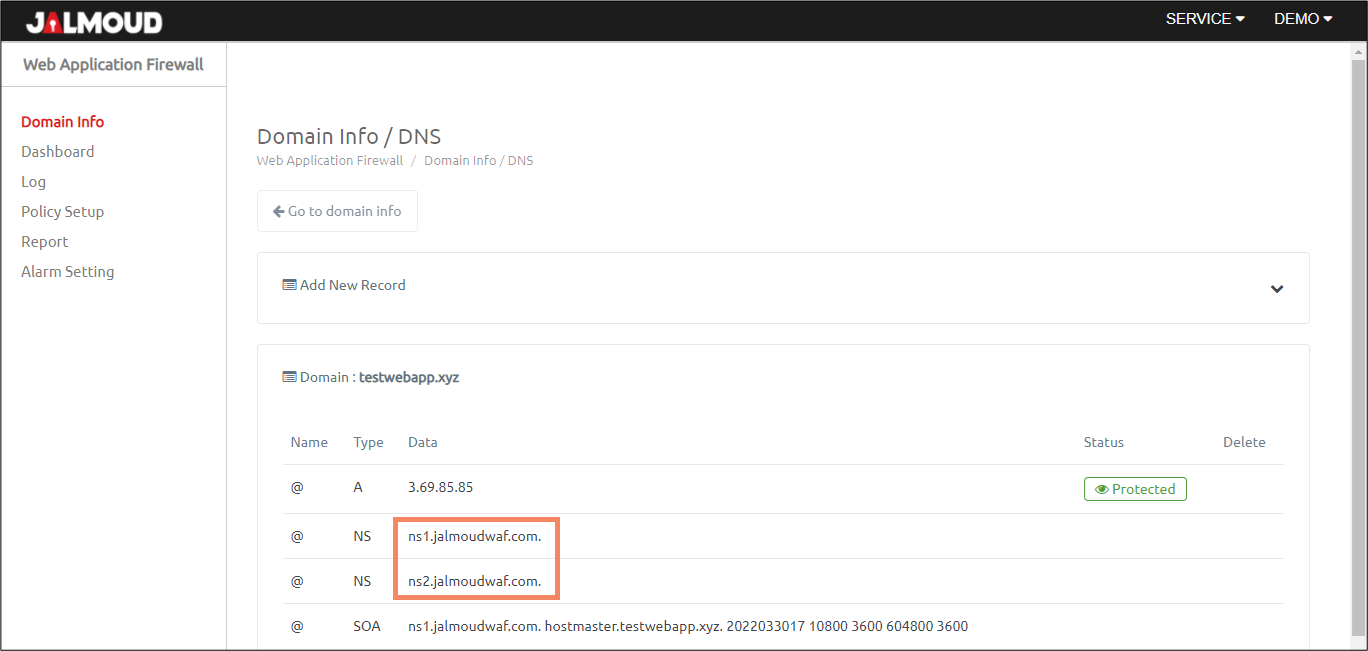
- After clicking the button, you will be redirected to below page. Record the ‘NS’ value, in this case ‘ns1.jalmoudwaf.com’ and ‘ns2.jalmoudwaf.com’
- Changing Name Servers differs based on the hosting service. Below are some references for most common hosting providers:
- Bluehost: How to Change Your Name Servers
- Hostinger: How to change nameservers at Hostinger?
- Hostagator: Changing Name Servers
- InMotion: How to Change your Domain’s Nameservers
- GoDaddy: Change nameservers for my domains
Verify DNS Changes #
Method #1 #
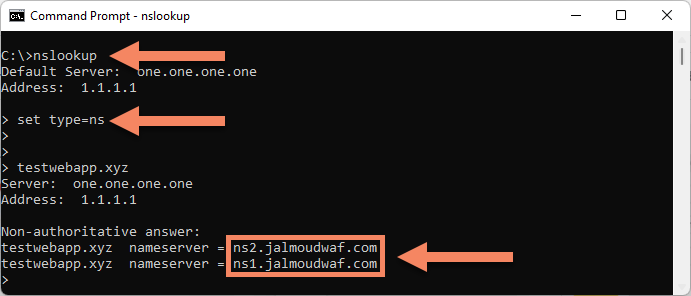
Open ‘Command Prompt’ on Windows or ‘Terminal’ on Linux.
- Type the command nslookup and press ‘Enter’
- Type the command set type=ns and press ‘Enter’:
- You should see the ‘NS’ records you have changed in the command output.
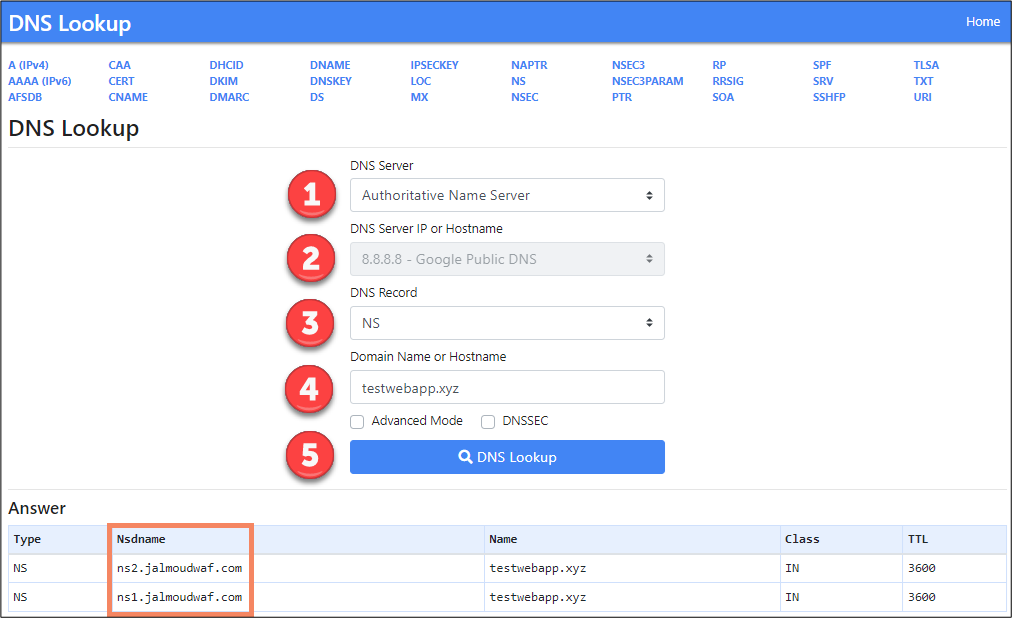
Method #2 #
Navigate to DNS Lookup website: https://dnslookup.online/
- Select DNS Server type: Authoritative Name Server
- DNS Server IP or Hostname field will be disabled
- Select DNS Record type: NS
- Type your domain in the ‘Domain Name or Hostname’ field
- Click the button: DNS Lookup
- You will find the new NS records in the Answer section.
To confirm, refresh in the domain list, expand the domain and you will see ‘DNS Status’ changed from ‘Not changed’ to ‘Healthy’.